
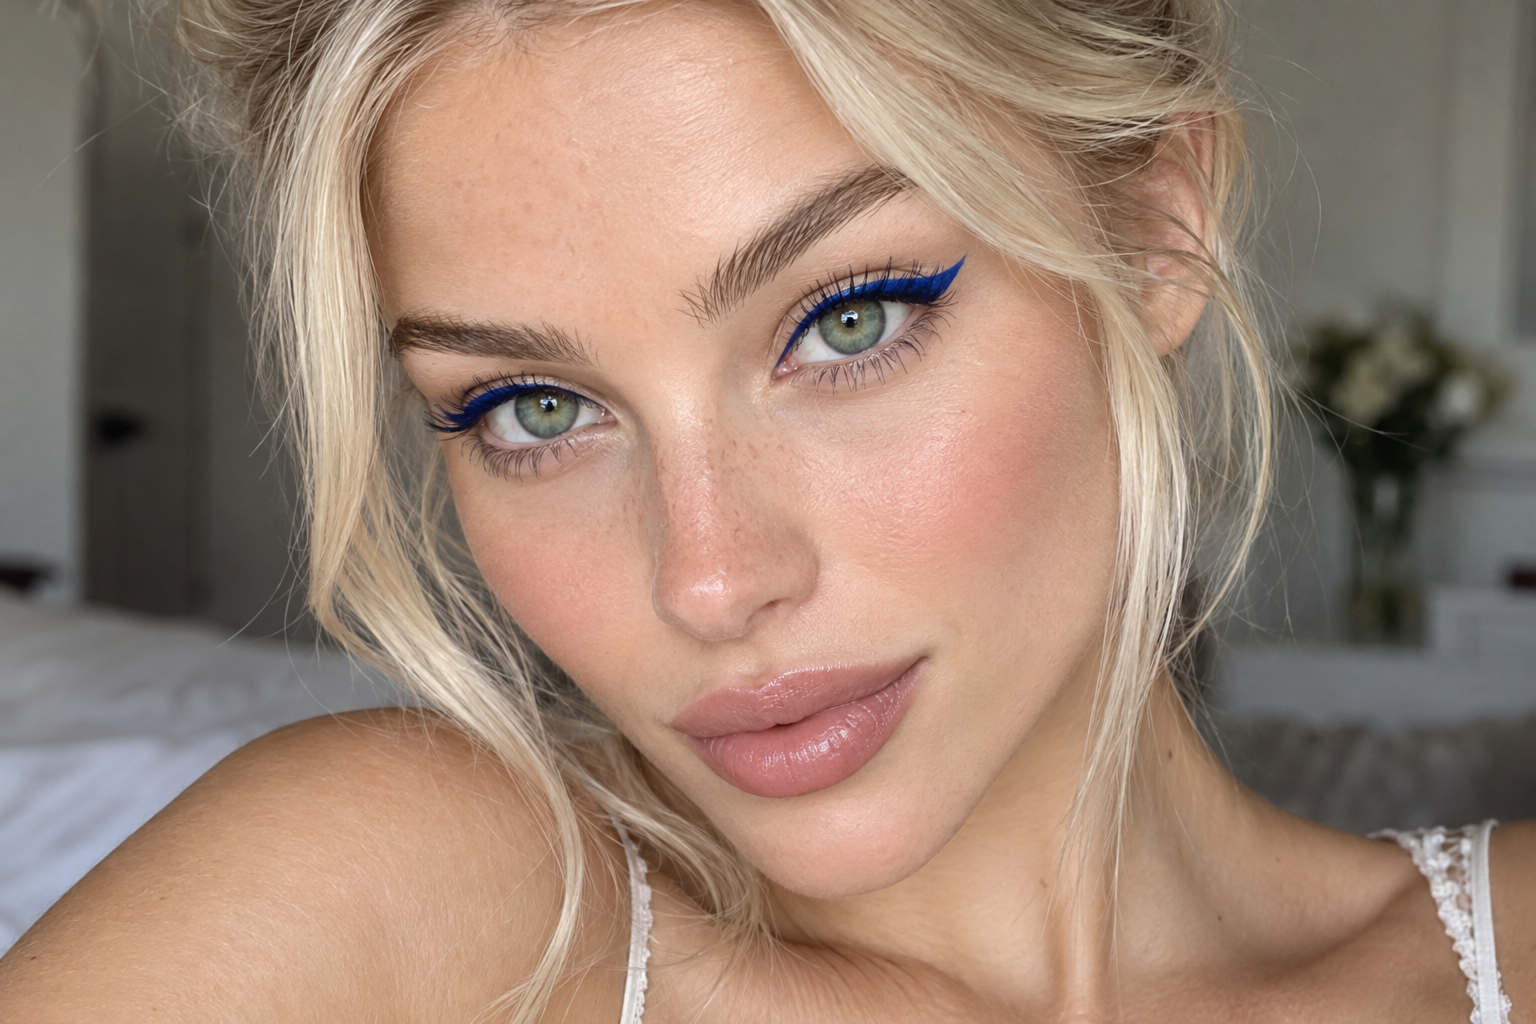
Blue looks lovely in a swatch, then somehow spreads farther across your eyelid than you meant it to. The easiest way to make blue makeup feel intentional is to decide on its shape first: a defined line along your upper lashes, or a softly edged patch of color on your lid.
You don’t need matching blue accessories or a complicated crease. Give the color a clear place to sit, then choose cheek and lip makeup that lets your eyes lead.
Quick answer: Choose blue liner for a smaller, defined accent or blue shadow for a fuller wash of color. Check the placement with relaxed, open eyes, and soften shadow’s edges without blending away its center.
Choose your blue makeup by contrast, not complexion rules
Start with the effect you want. Navy gives you deeper definition, denim offers a muted blue, and brighter shades make the color more noticeable. Matte and satin finishes are less reflective than shimmer, which adds light-catching detail.
Any skin tone can explore any of these options. What matters is how the particular shade and formula look on your eyelid, not which complexion category the packaging suggests.
Check the color in ordinary light. If a pastel looks paler or more opaque than you wanted, try a sheerer application or another formula. If navy reads almost black, a slightly brighter blue may make the color easier to see.
You also don’t need a white base. An eye primer is optional; use one if it fits your routine and the shadow’s directions.
Use blue liner or shadow intended for the eye area, and set aside anything that irritates your eyes.
Look one: a defined blue upper-lash line
Choose this route when you want blue to be noticeable without covering much lid space. A clean line gives the color structure, while the rest of your eye makeup can stay simple.
- Keep the lid quiet. Leave it bare or add a light wash of a neutral shadow. Neutral doesn’t have to mean pale beige: taupe, brown, rose-brown, or another shade close to your skin’s depth can provide a soft backdrop.
- Draw in short sections. Begin around the middle of the upper lash line and work toward the outer corner, keeping the color close to the lash roots. Connect the inner section afterward if you want a full line. Small strokes are easier to control than one ambitious sweep.
- Check before making it thicker. Look straight ahead with your brows relaxed. If your lid partly disappears into a fold, a narrow line leaves more visible space. Thicken only where you want more color rather than enlarging the whole line.
- Add an extension only if you want one. With your eye open, mark a short outward flick, then connect it to the lash line. You can also stop at the outer corner; blue doesn’t need a wing to look finished.
Match your technique to the formula. A smudgeable pencil can be gently softened along its upper edge while workable. A precision liquid suits a crisper outline, but follow its directions rather than repeatedly brushing over a setting layer.
Leave the lower lash line bare or softly neutral for this version. Finish with mascara if you like, keeping the blue visible rather than hidden beneath heavy additional liner.
Look two: blue shadow with a soft border
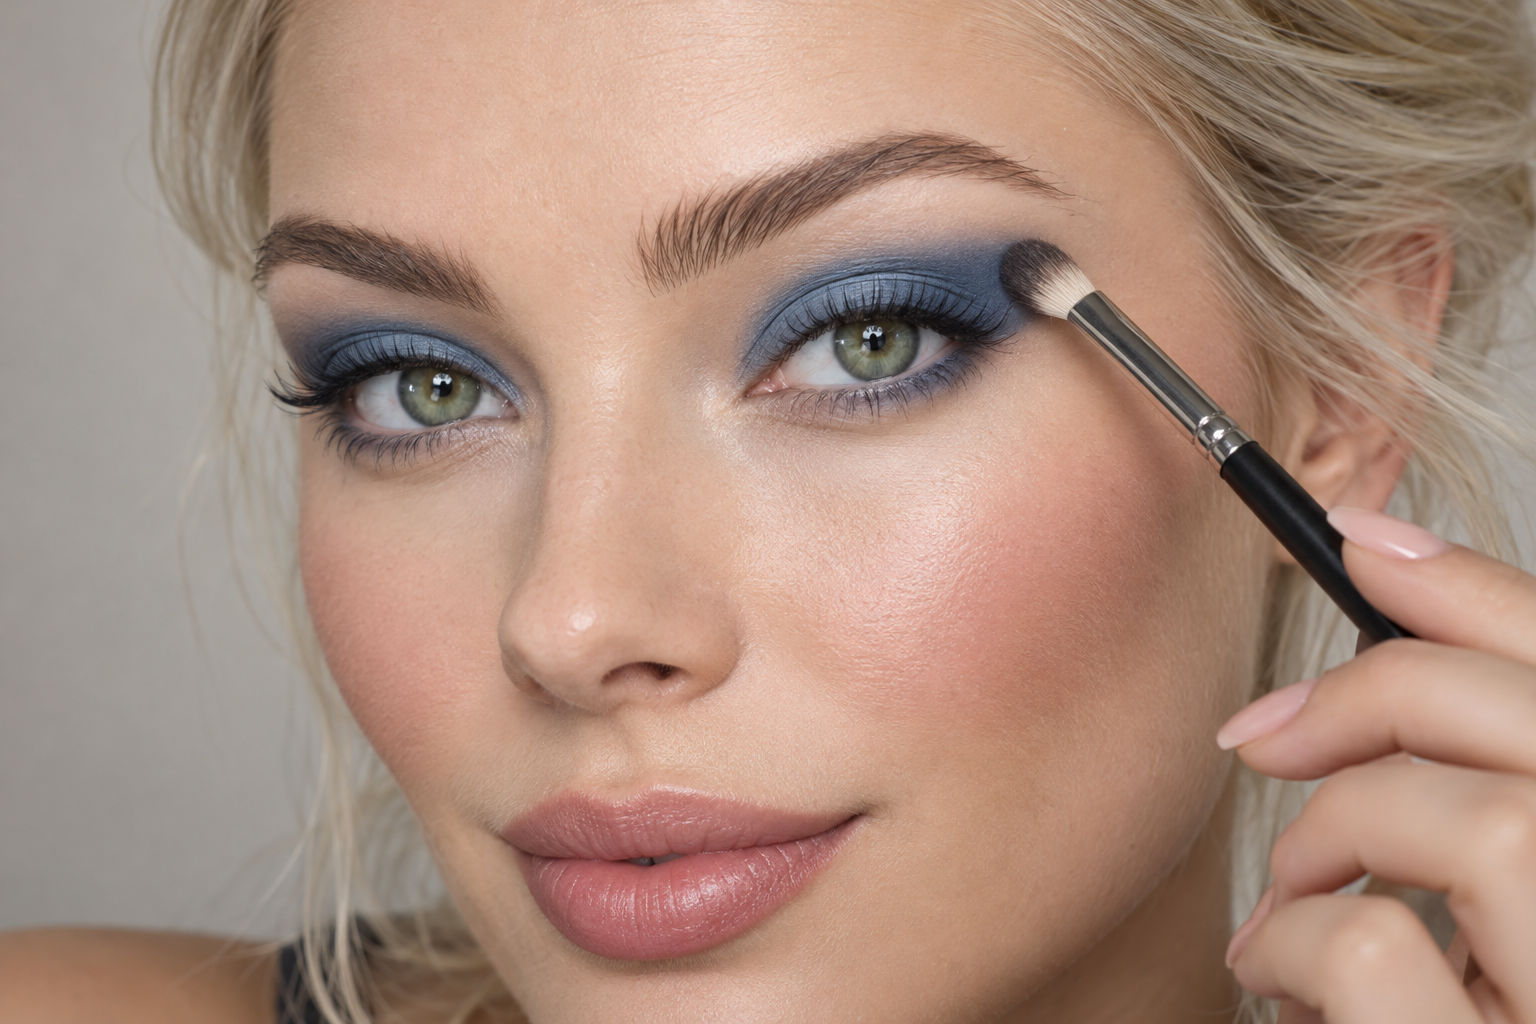
Choose shadow when you want a larger area of blue. The detail that makes the difference is separating placing the color from blending its edge. Using one fluffy brush for everything can spread the blue farther than you intended.
- Start on the mobile lid. For powder shadow, pick up a little color with a dense, flat brush, tap off loose excess, and press it onto the lid below the crease. Begin near the center and build outward in small patches.
- Keep the center intact. Once you have the coverage you want, switch to a clean, softer brush. Make small, light movements along the upper and outer boundaries only. You’re softening the outline, not sweeping through the entire blue area.
- Add a neutral edge if helpful. A little taupe or brown just beyond the blue can ease the transition into bare skin. Choose a depth that shows softly on you, and avoid brushing it through the blue’s center, where the colors may become less distinct.
- Assess with your eyes open. If the blue vanishes into a fold, extend a small section of the upper or outer edge until it’s visible with your brow relaxed. You don’t have to take the color all the way to the brow bone.
For cream or liquid shadow, use small amounts and follow the formula’s application and setting instructions. Some allow more blending than others, so don’t assume you can work them like powder.
Keep extra liner minimal or skip it. If you want more lash definition, a fine line at the roots can support the shadow without becoming a second main feature.
Balance your cheeks and lips without washing them out
For this eye-focused look, think about intensity before hue. A softly applied berry lip can feel quieter than an opaque pale nude, especially if that nude contrasts strongly with your natural coloring.
These are useful starting points, not complexion assignments:
- Fair or light skin: softly applied pink, peach, or rose cheeks, with a lip shade near your natural lip color.
- Medium, tan, or olive skin: rose, peach-brown, or muted terracotta, adjusted to the depth you prefer.
- Deep skin: rose-brown, berry, terracotta, or a deeper nude that doesn’t look lighter than intended.
If the face feels too understated beside the blue, add a little cheek color before changing the eyes. If everything feels equally bold, soften either the blush or lip intensity. You can absolutely wear a colorful lip; these choices simply help blue remain the focus.
Before you add more blue, check the shape
If shadow has spread too far, pause the blending. Remove a little excess at the outer boundary with a clean brush rather than adding more color everywhere. If it looks patchy, press a small amount onto the sparse spot instead of sweeping over the whole lid.
For your first try, choose just one route: a slim blue line or a softly edged blue lid. Look straight ahead before expanding it. That open-eye check tells you more about the finished look than another layer applied with your brow lifted.
